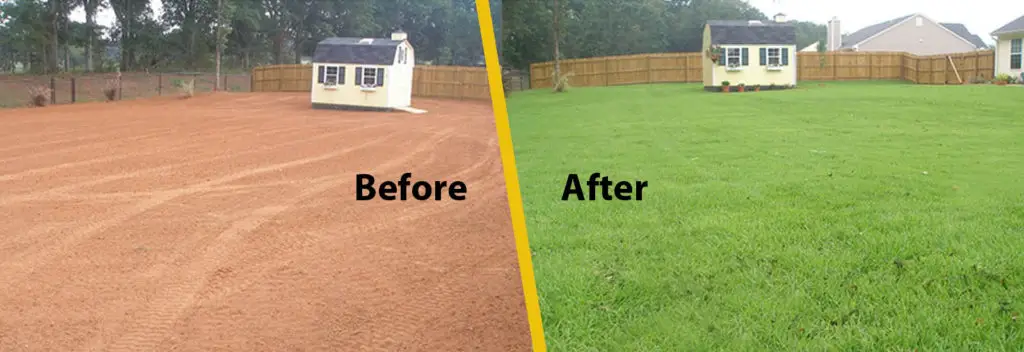
When my wife and I bought our first home a few years ago, the backyard was a complete disaster. Years of neglect had left us with a patchy, weed-infested lawn that was more dirt than grass. We knew we wanted to transform it into a lush, green oasis, but traditional sod was out of our budget.
That’s when we discovered hydroseeding – an affordable way to quickly establish a full lawn from seed. I have to admit, I was a little skeptical at first. Spraying a slurry of seed, mulch, and fertilizer over the ground seemed almost too good to be true.
But after doing some research, I learned that hydro seeding is an incredibly effective method, used by professional landscapers and municipalities. When done properly, it can give you a thick, healthy lawn in a matter of weeks rather than months. We decided to give it a shot, and I’m so glad we did!
Also read: The 5 Best lawn mowers for zoysia grass
What is Hydroseeding?
Hydro seeding is a planting process that involves spraying a slurry mixture of seed, mulch, fertilizer, and other additives onto prepared soil. Here’s how it works and the key benefits and considerations for caring for a hydro-seeded lawn.
How Does Hydroseeding Work
The hydro-seeding process typically involves the following steps:
- Soil preparation – The area is cleared of existing vegetation, tilled, graded, and prepared for seeding.
- Mixing the slurry – Grass seed, wood fiber mulch, fertilizer, tackifiers (to help the mulch adhere to the soil), and sometimes lime or dye are mixed with water in a hydroseeder machine to create the slurry.
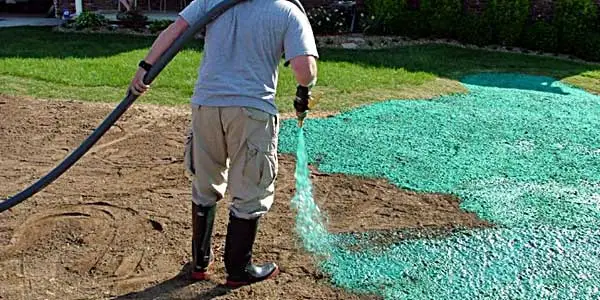
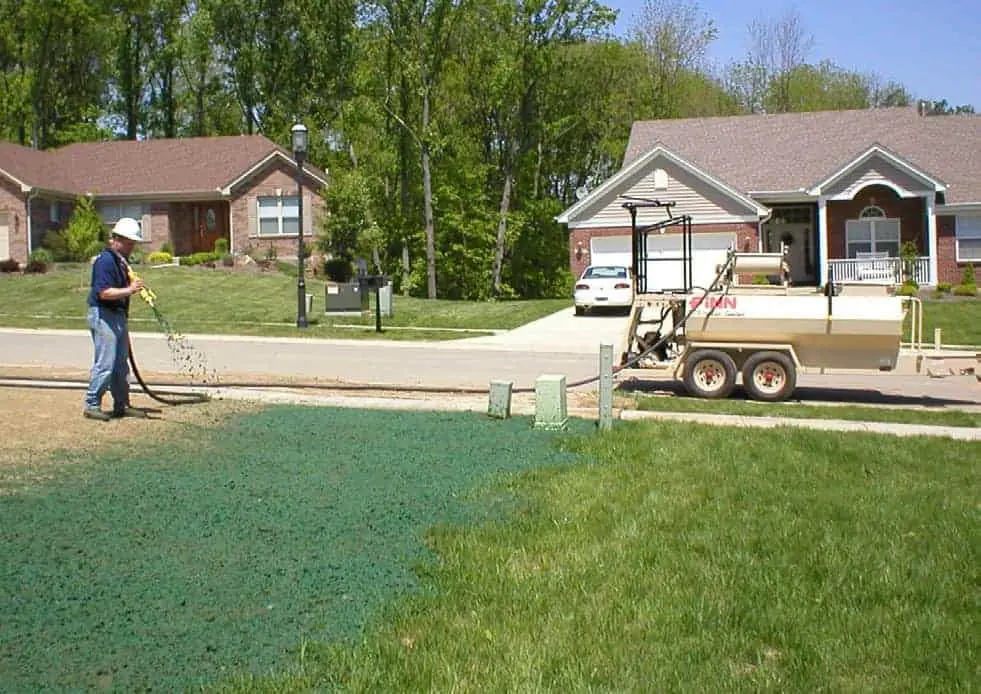
- Spraying the slurry – The slurry is loaded into a tank on a truck or trailer and sprayed evenly over the prepared soil using high-pressure hoses.
- Germination – The mulch helps retain moisture to promote quick seed germination within 5-10 days.
Benefits of Hydro Seeding
- Cost-effective for large areas – Hydroseeding is generally cheaper than laying sod but more expensive than traditional seeding for small areas.
- Quick establishment – Grass growth appears in about a week, and the lawn is typically fully established within 3-4 weeks.
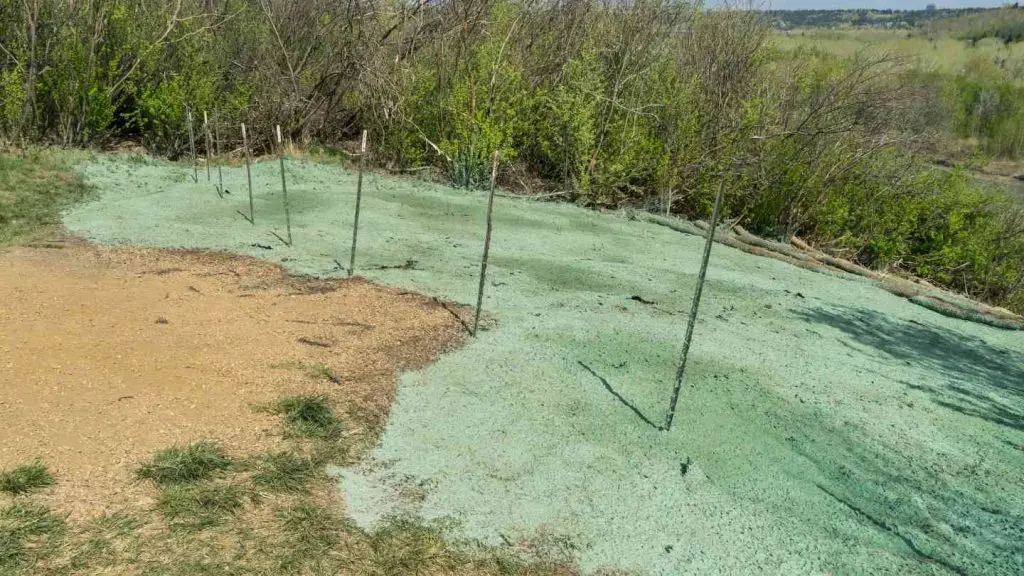
- Erosion control – The mulch layer helps stabilize the soil and prevent erosion until the grass is established, making it ideal for slopes.
- Customizable seed blends – Different seed varieties can be mixed to match soil, climate, and desired grass characteristics.
- Healthier root systems – Seeds germinate in the existing soil, allowing roots to establish naturally for better drought and disease resistance compared to sod.
Common Mistakes to Avoid
- Improper site preparation – Inadequate tilling, grading, or removal of debris can lead to uneven germination.
- Using the wrong seed mix – Selecting seeds not suited for your climate or soil conditions can result in poor growth.
- Under or over-watering – Newly hydro-seeded lawns require consistent moisture, typically watering 2-3 times per day for the first 2-3 weeks. Too little or too much water can kill the seedlings.
- Allowing foot traffic too soon – Walking on the new lawn before it’s fully established can damage or kill the young grass.
- Improper mowing – Mowing too soon, too low, or removing more than 1/3 of the blade height can stress the immature grass.
Preparation is Key
Here’s how we cared for our hydro-seeded lawn to get that magazine-worthy look.
The prep work before the actual hydroseeding is crucial. You want to start with a blank canvas by killing off any existing weeds and grass. We used a non-selective herbicide and let it do its work for about two weeks. Then it was time to dethatch and rake the area thoroughly to remove any dead material.
Next up was tilling the soil to a depth of 4-6 inches. This loosens up the dirt so the seeds can easily take root. I made sure to break up any large clumps as I went. The final prep step was raking the area smooth and evenly grading it to allow for proper drainage.
I can’t stress enough how important this foundation is – skimping on the prep work will just lead to patchy growth down the line.
The Main Event: Hydro Seeding Day
We hired a professional hydroseeding company to do the actual application. On the scheduled day, they arrived with a large tank truck full of the hydroseed slurry.
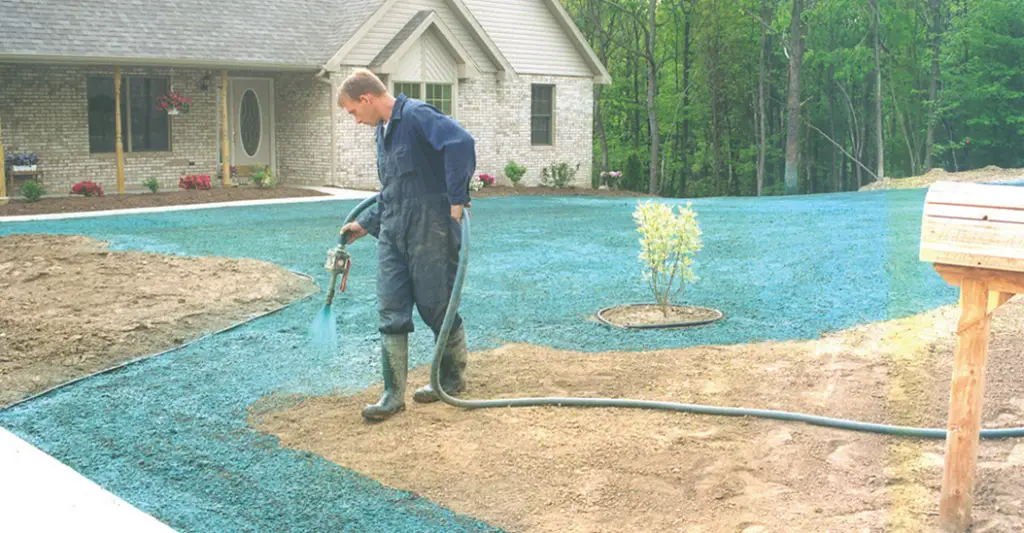
The green liquid contained seed, fertilizer, wood fiber mulch, and a tackifier to help it all adhere to the soil. Watching them spray the slurry with the high-powered hose was honestly pretty messy but satisfying!
They covered every inch of our yard with the thick, goopy mixture. When they were done, it looked like someone had dumped a vat of split pea soup all over our lawn. But I knew that gunky green blanket held the seeds for our future paradise.
The Anxious Wait
For the first couple of weeks, it was tough to be patient. The hydroseed needs to be kept consistently moist during the germination period, so we were out there with the sprinklers multiple times a day. I diligently checked for any dry spots and hand-watered those areas.
Around 10 days in, I started seeing those first precious sprouts peeking through the mulch layer – tiny strands of green fuzz! Each day more and more would appear, and by week 3 we had a full lawn of lush growth. The hydroseed had worked its magic. I could hardly believe we had transformed our yard from a dirt patch to a verdant carpet in just a few short weeks.
Caring for, and Maintaining That Lush, Hydro Seeded Look
Of course, the work wasn’t over once the grass emerged. A newly hydro-seeded lawn requires some extra TLC while it gets established. For the first 6-8 weeks, I fertilized every 2 weeks with a high phosphorus fertilizer to encourage strong root development.
Mowing is also key – you want to cut the grass when it reaches about 3 inches tall, removing no more than 1/3 of the blade height. I stuck to this rule religiously, mowing frequently to train the grass to grow thicker. Overseeding any bare or thin spots also helped to fill in the lawn.
Once we hit that 2-month mark, our hydro-seeded lawn was well on its way! But I didn’t stop pampering it there. To keep it looking magazine-cover-worthy, I followed a few simple lawn care principles:
- Aerated twice a year (spring and fall) to allow air, water, and nutrients to penetrate the soil
- Overseeded thin areas annually in early fall
- Applied a balanced fertilizer every 6-8 weeks during growing season
- Mowed at 3-4 inches height, never removing more than 1/3 of the blade
- Watered deeply but infrequently to encourage deep-root growth
With some good old-fashioned elbow grease and these lawn care basics, our hydro-seeded lawn has transformed into the plush, emerald-green oasis we always dreamed of. Neighbors constantly compliment us on how fantastic it looks. And the best part? We were able to achieve this gorgeous lawn for a fraction of the cost of sod or a total re-landscaping.
If you’re looking to get a full, healthy lawn fast, I can’t recommend hydroseeding enough. It’s affordable, effective, and with a little patience and proper care, you’ll be rewarded with a lush, envy-of-the-neighborhood yard in practically no time!
Trust me, all that hard work prepping and maintaining the hydroseed is worth it when you can run your toes through that thick, velvety grass.